3D Update
The 3D / VR mode for Aerodrums is now available as a beta release. This is a free software update that complements the Aerodrums experience by augmenting it with a 3D view and support for VR headsets. If you are new to Aerodrums we recommend that you first familiarise yourself with the standard Aerodrums interface before trying out Aerodrums in 3D or VR.
The current release supports Android, iOS, Windows and Mac OS X, along with VR support for Oculus Quest, Quest 2, Rift, Go and Samsung Gear VR.
The release consists of a major update of Aerodrums itself (to version 1.1), plus a new application called Aerodrums 3D.
Aerodrums 3D is not a replacement for Aerodrums. It is a separate application that runs alongside Aerodrums and communicates with it over the network.
Aerodrums and Aerodrums 3D can either be run on the same computer or on separate devices (e.g. a computer and a tablet), provided they are both connected to the same network. For most users this will be a simple matter of having both devices connected to the same WiFi network but there are other ways to connect without WiFi such as creating a Mobile Hotspot on an Android device and connecting your computer to that network or creating an ad hoc network from Windows or OS X.
How to Install
The Aerodrums 1.1 update and the Windows/Mac versions of Aerodrums 3D can be downloaded (separately) from the software page at aerodrums.com/installer. The Android and iOS versions can be found on Google’s Play Store and Apple’s App Store respectively by searching for “Aerodrums 3D”.
To download Oculus Quest or Quest 2 versions, you can download direct from the Oculus website. Or from the Oculus app by searching for “Aerodrums 3D” and clicking the View App button at the bottom.
To download and install the Oculus Go or Gear VR version, you will first need to email support@aerodrums.com to request an Oculus Key. Once you receive this, you can redeem it through the Oculus app (in the case of Gear VR) or from here: https://secure.oculus.com/redeem-code/ (note: this requires logging in to the Oculus site).
If you are a Windows user, please note that you cannot use the usual Aerodrums update wizard to automatically update Aerodrums to version 1.1. Instead, you need to download a specific updater to version 1.1.
Aerodrums 3D is tuned for the new Aerodrums stand that will be available for purchase soon. In the meantime, for best results Aerodrums should be set up in the usual way with the exception that your seat should be placed directly in front of the camera, not displaced 20cm to the side.
The user is assumed to be 5′ 11″, sitting on an average height seat. If you are using VR and this feels unnatural you can change the Eye Height from the View section of the menu.
Aerodrums 3D shows your feet in 3D but it is important to remember that Aerodrums will trigger the closest pedal to a foot so there is no need for your feet to be directly over the 3D pedals. Still, remember that angling the markers on your feet to point more towards the camera can help ensure that the markers are always clearly visible to the camera.
Aerodrums 3D will also show your sticks in 3D as your move them around. It should be noted however that the positional tracking of your sticks is not perfect and their orientation is not tracked so the appearance of the sticks won’t always match your expectation. You will quickly get used to this and, if you play Aerodrums in 3D as you would when viewing the 2D interface, we hope you’ll find that it starts feeling very natural after a short amount of time.
The tracking of the sticks works best with ball markers that are in good condition. The tracking can also vary based on the amount of ambient light in the environment. These two factors can be compensated for by changing the Stick Offset slider in the View sub-menu. This may not be necessary if viewing 3D on a flat display but if you are using VR and you find that there is a big discrepancy between the position of your hands in 3D and your hands in real life then it can help to adjust the Stick Offset parameter to “line up” your real and virtual hands. Note however that changing the Stick Offset parameter will require repositioning your drums.
The Aerodrums drumming screen now features a button in the bottom right corner that can be used to launch the Aerodrums 3D application on the same computer that Aerodrums is running on. If you wish to run Aerodrums 3D on a different computer or mobile device you should launch Aerodrums 3D yourself. It will automatically connect to Aerodrums once both are running.
On Windows, when Aerodrums and Aerodrums 3D are run for the first time, Windows may pop up a security alert asking if you would like to grant these applications access to the network. You should allow access so that the two applications can communicate with each other. (As has always been the case, Aerodrums does not “call home” for any reason, the network access is only required for local communication.)
Furthermore, the first time Aerodrums is run it will adjust your drum kits to adapt them to the new 3D tracking. Because this is an imperfect automated process, Aerodrums will advise you to place the pieces of your custom drum kits again. This is the best way to make them behave as well as before and look correct in 3D.
Aerodrums 3D will automatically pause itself if it is not the foreground window so if you are running Aerodrums and Aerodrums 3D on the same computer, please make sure that the Aerodrums 3D window has focus and also make sure that the Aerodrums window is not minimized as this will also prevent Aerodrums 3D from updating. Likewise, if you are using the Oculus Rift then Aerodrums 3D will stop updating if the headset is not being worn.
If you have an Oculus Rift but don’t wish Aerodrums 3D to use it, you can prevent this by launching Aerodrums 3D with the command line parameter ‘-vrmode none’. By default Aerodrums 3D will mirror the display from the headset onto the desktop. By specifying ‘-cam’ as a command line parameter you can force the desktop display to instead render a separate view, similar to when Aerodrums 3D is run without VR.
Download Aerodrums 3D


Using Aerodrums 3D
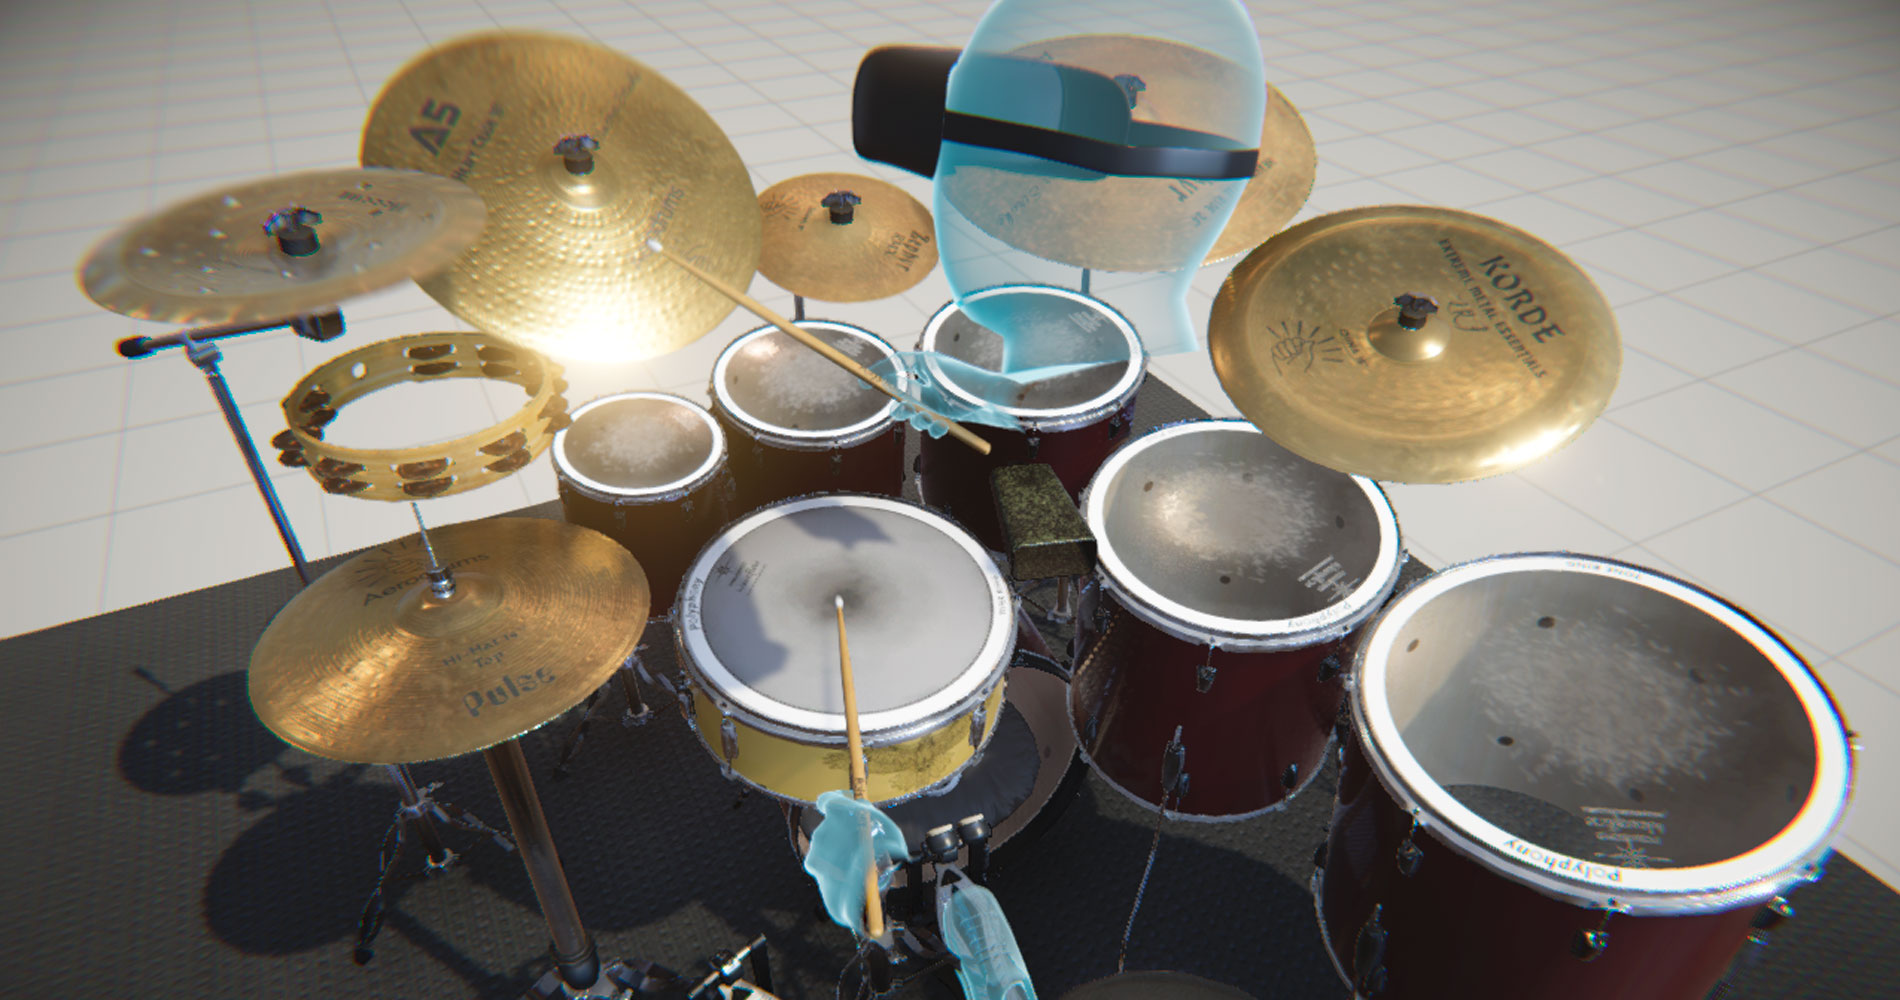
By entering the menu and going to Drum Kits -> Move Drums, you can enter a mode that allows you to select and move drums in 3D. In this mode, the screen will pulsate with a yellow tint. Any drum or pedal can be selected by hitting it with a stick (in the case of drums) or tapping it with a foot (in the case of pedals). Once selected, it can be moved around using the same limb used to select it. When you’re happy with its new position you can place it by triggering a hit with any limb. So, for example, you could select the kick drum by tapping your right foot, repositioning it to the right by dragging your foot to the right and then deselect it by making a hit gesture with your right stick.
Please note that the bounds within which you can place drums are limited to what the camera can track. If a drumstick is too far to the left or too far to the right to be tracked well, a barrier wall will appear on the corresponding side to indicate this. When moving drums it is best not to place them outside of the barriers as this will make reaching them difficult. Also note that if a drum is moved so far on any side that it can no longer be tracked at all then it will automatically be unselected and will snap back to its original position.
Please keep in mind that it’s perfectly fine for drums to overlap in 3D and you shouldn’t try to prevent this if it requires shifting the drums from where you normally have them positioned. The ability to hit the drum you intend won’t be compromised by letting them overlap so it’s generally not a good idea to place the kit pieces so that the final result looks like it would in real life. Due to the limited tracking volume it is better to allow some overlap if it makes reaching drums easier.
As with running Aerodrums by itself, when running Aerodrums 3D alongside it on the same computer, it is crucial that the performance indicator in the Aerodrums window appears green and not red. Green means that Aerodrums is able to maintain the required frame rate of 125 frames per second. As long as this is the case, what you hear while drumming will sound fine irrespective of how smooth the graphics appear in Aerodrums 3D. If it is not the case then you will need to experiment with some settings to figure out if and how you can make the Aerodrums performance indicator stay green. Here are some things you can try:
When Aerodrums 3D is run on a Windows PC or Mac, it will show a configuration window that lets you choose the desired screen resolution and graphics quality. You can improve performance by choosing lower resolution and quality settings.
You can improve performance by limiting the maximum frame rate of Aerodrums 3D. The View sub-menu has an ‘FPS Limit’ setting that can be used to change this. The default setting is ‘None’ which means that Aerodrums 3D will render at as high a frame rate as it can achieve. You can change the target frame rate to 30 frames per second or 60 frames per second which will greatly improve performance while only having a marginal effect on the smoothness of animation. (Note that the current frame rate is shown in the bottom right corner of the menu screen.)
Another way to drastically improve performance is through the ‘Full Anim Mode’ button in the View sub-menu. By hitting this button you can cycle through three modes: ‘Full Anim’, ‘Partial Anim’ and ‘No Anim’. ‘Full Anim’ mode will render all objects in the scene every frame. ‘Partial Anim’ mode will avoid rendering most objects and only render those that are animated (drumsticks, feet and cymbals). ‘No Anim mode’ will further disable animation of the cymbals. The ‘Partial’ and ‘No Anim’ modes will be substantially faster than the ‘Full Anim’ mode. (Note that since VR requires a constantly changing viewpoint, VR will always use the ‘Full Anim’ mode.)
On mobile VR devices, some additional options are available in the Graphics Settings sub-menu that can give a big performance boost. These options can help prevent frame rate drops when using large drum kits and also prolong battery life and prevent overheating. The Render Scale slider can be used to trade off display resolution for performance. The lower the value, the “blurrier” the display will appear but the better the performance will be. The Optimize Meshes button will remove parts of the drum kit that aren’t visible from the drummer perspective thereby reducing the amount of graphics that need to be rendered. It is highly recommended that you hit this button after running Aerodrums 3D for the first time and after you switch drum kit (the optimized meshes will persist between sessions but will be lost if the drum kit is changed). In addition, it is recommended to keep display of limbs disabled as these are very costly to render.
Finally, for the Windows version of Aerodrums 3D, it should be noted that the default scene (Scene 1) is a lot simpler in terms of graphics than the warehouse environment (Scene 2) so if using ‘Full Anim’ mode then Scene 1 will perform a lot better. Also, keeping Trail and Sparks effects disabled will improve performance a lot.
To exit Aerodrums 3D when displaying it full screen, press the Esc key.
The viewpoint can be changed freely by using standard “free cam” controls. The W,A,S,D keys allow movement forwards, backwards, left and right. E and Q will move up and down. And dragging the mouse while pressing the right mouse button will allow rotation.
The left and right keyboard arrows can be used to move between the preset viewpoints (also accessible from the View sub-menu when not using VR).
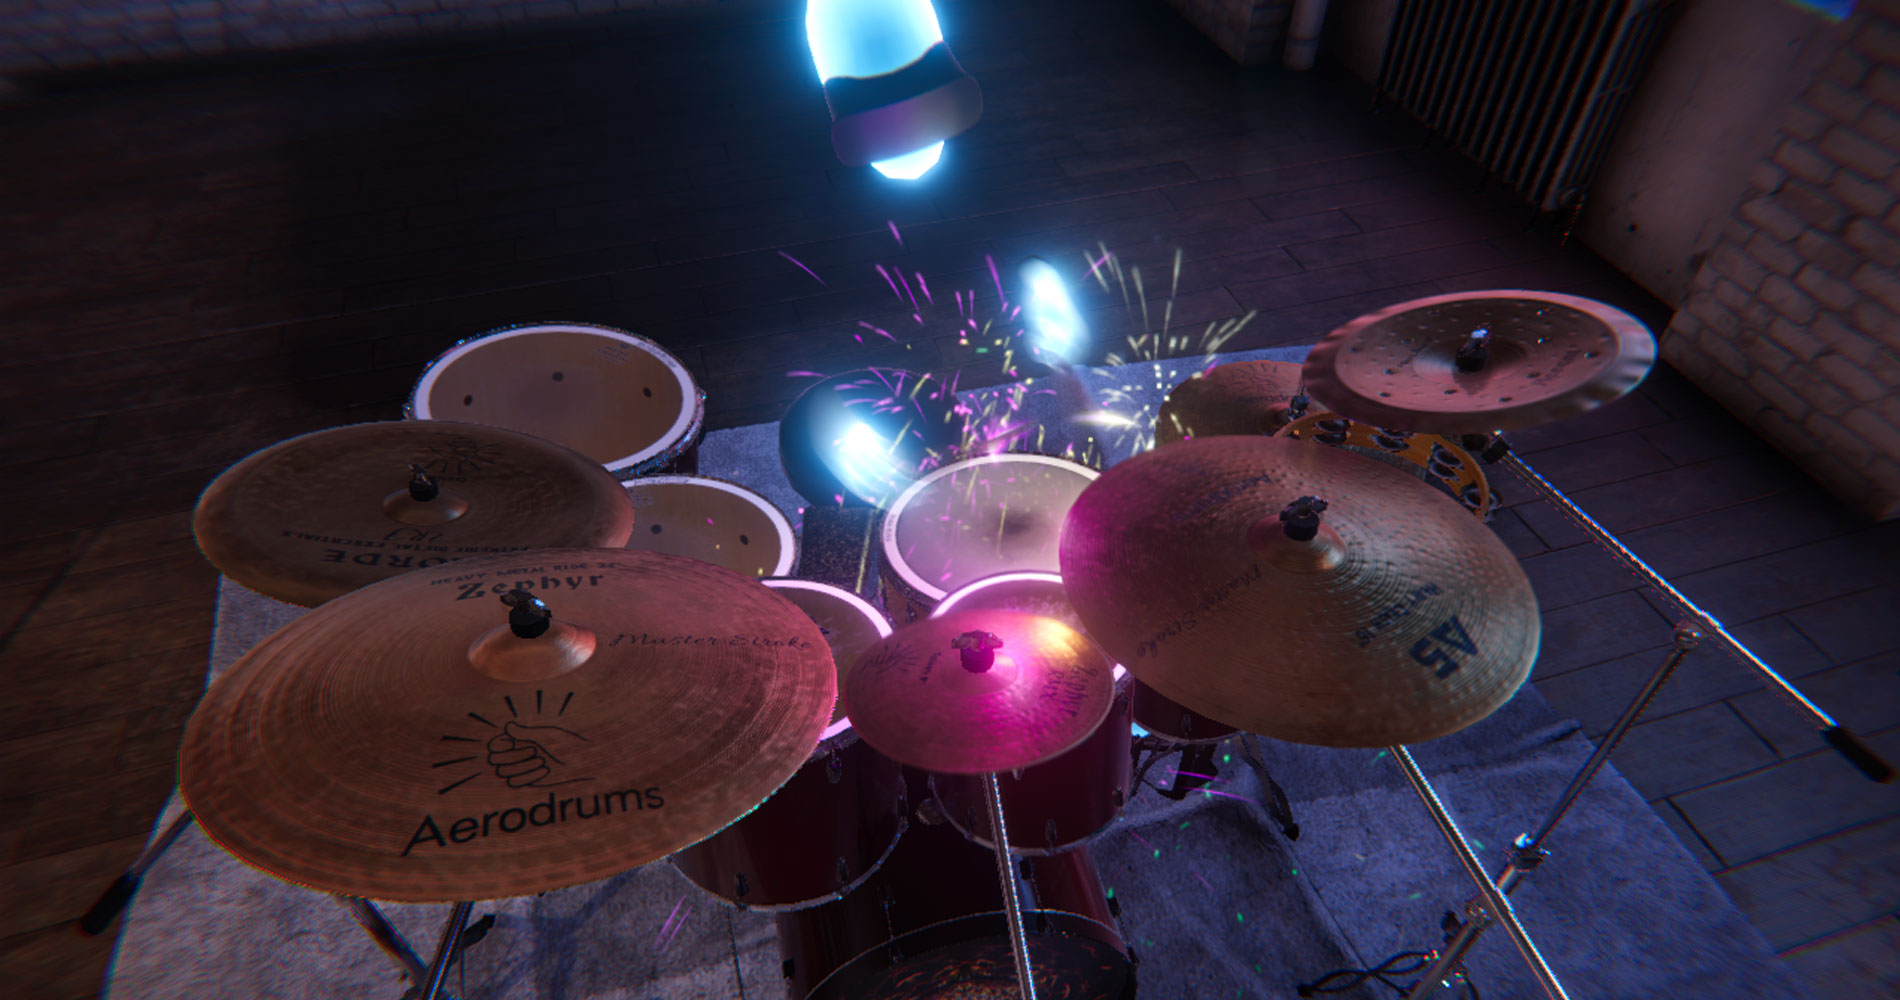
Keys 1 and 2 can be used to switch between Scene 1 (the default scene) and Scene 2 (the warehouse scene). When using Scene 2, the way that the environment is lit can be changed by pressing F5 to cycle through a number of lighting presets. (Note that Trail and Spark effects look best in Scene 2 with dim lighting.)
Known Issues
- This is a beta release. Only the most useful features from Aerodrums are exposed in Aerodrums 3D so there are some settings that will require you to switch back to the Aerodrums window to adjust.
- In the current Windows/Mac release, not all settings are saved between runs of Aerodrums 3D. In particular, the options on the Graphics Settings sub-menu will not persist. Please keep this in mind if you find that the ‘Partial Anim’ or ‘No Anim’ mode is necessary to achieve satisfactory performance.
- Occasionally Aerodrums will confuse your left and right stick markers resulting in your left and right sticks swapping. This will usually correct itself as you keep playing (e.g. if you hit the snare multiple times with both hands) but you may also correct it by physically swapping the sticks in your hands.
- On Oculus Rift, changing the Render Scale slider (accessible from the Graphics Settings sub-menu) will result in temporary screen flicker.
- On iOS devices, the Aerodrums 3D app may fail to reconnect to Aerodrums after switching to and from other apps. If this happens, please relaunch Aerodrums and the Aerodrums 3D app.
- In VR, the Optimize Meshes button will reduce the polygon count for the current drum kit to improve rendering performance. If you subsequently move a drum then the way it’s displayed may look incorrect. To fix this you will need re-load the drum kit by temporarily switching to a different drum kit and back and then hitting the Optimize Meshes button again.
- There is currently no support for handheld controllers on Oculus Go and Gear VR so the Aerodrums drum sticks need to be used to interact with the menu.


Continue with Facebook
Continue with Google
To get Aered